Showing posts with label decorating. Show all posts

Friday, September 14, 2012

"Beachy Blues Buffet" Tabletop

Sometimes a piece of fabric can inspire a table top!
In this case, a piece of Hawaiian print fabric in a variety of blues just happened to be what I needed to set the tone for a casual beachy buffet I hosted recently.

The yardage was one of the last things left in my mother-in-law's house when we were moving her to her new home.  I loved the various hues of blue and I thought the batik type print gave a Carribbean vibe.  The beachy buffet was held to thank those who had donated to my son's recent humanitarian trip to Haiti!
The colors in the fabric matched a lot of my depression glass that I had been collecting over the years so I gathered some pieces and put them to use.  The dark blue apothecary jar was my most recent find!

 I chose yellow and white daisies to contrast with all the blues!

The napkins were rolled up and encircled with jute napkin rings and placed in my cherished vintage sand bucket found at the Sacramento Antique Fair.

The light blue milk glass pedestal bowl was a gift from my husband - filled with lemon heads to carry the yellow through the table scape.  The vintage paper fish coasters were thrift store find, as was the blue cut glass handled bowl they are nestled in.

Here's a close up of the milk glass - I just love the curves in the pattern! 
They remind me of the ocean waves!

The tiny seahorse slat and peppers had to be included!

After adding the little starfish and some silver glass glitter to the edges of this sign found at Marshalls, it was ready to welcome the guests!

I placed the blue vase filled with daisies atop a vintage soda crate to create some height, added a couple of blue and yellow candles in a pair of milk glass candlesticks, a few seashells, and the "Beachy Blues Buffet" table top was complete!

I'm linking up to Tabletop Tuesday!

Monday, September 26, 2011

Whispering Pines Antiques - Amarillo, Texas

 Once we entered Texas on Route 66 while on our road trip,  I quickly checked the back of my Romantic Homes Magazine to see if any shops were close by. Little did I know I was about to find a fellow blogger and a place I want to get back to soon!

 Lucky for me, nestled between a row of antique shops on 6th  Street, in the Historic San Jacinto District of Amarillo, Texas, I found a unique home decor shop,Whispering Pines Antiques.  

After being on the road a while, and then entering this shop with its welcoming country prairie theme, the homey atmosphere made me want to just settle in for the day.  I have a particular fondness for all things bee related, so when one of the first accessories I saw was the bee skip atop this cupboard, I knew I had found a kindred spirit in shop keeper Angie Mitchell. Angie was so welcoming and gave me all kinds of information about where to shop in the area.

Then I looked down and saw the checkered floor - similar to Melange's, but not set on the diagonal - another sign!   I was in awe over the way Angie layered her linens on the twin bed in the middle of the shop - there was burlap, and leopard, grain sacks and linen and it all worked beautifully together.  

 A fireplace sits center stage and even though my visit landed in the dog days of summer,  it seemed to call you in to stay a while.

This tabletop display shows how Angie brings the outside in by incorporating pine cones, greenery, antlers and lots of pine wood to carry on the cabin feel.

Surprises pop up in smaller vignettes - here a vintage pair of ladies lace up boots sits perched alongside a vintage bottle and vanilla scented candle.

A pine bough wraps itself around vintage crib springs - a pair of shutters tucked away behind while a gorgeous carved chair presents itself in front.

Angie has a second twin bed dressed in the second room. I love the way the white linens were layered with the earth tone floral giving it a pop of crispness.  A breakfast tray sits on the bed complete with plates and napkins.  At this end of the bed, two busts sit with another serving of dishes - perhaps company is coming?

Heading back into the main room I looked up and there was a full size canoe suspended from the ceiling!  The pine paneling throughout the main room provides a honey hued glow and serves as a perfect backdrop for displaying forest greens, warm reds and even a shabby piece or two.

Good lighting makes an impact without being obvious and Angie has it down.  Lamps cast soft glows to accent various pieces such as on this vignette of a salvaged grate,  a bowl of vintage photographs and a couple big Texan seashells.

The natural light cast on this dress form sporting a garden apron makes you think she's going to grab the basket and head out into the crisp morning to gather flowers or pick the daily vegetables in the garden.

The shabby porch railing was one of my favorite pieces in her shop.  The ghost and green pumpkins filling up the pull cart next to it left nothing to imagine - it was easy to picture it on my own front porch. As I thought about Whispering Pines Antiques, it is that which makes it such a beautiful escape - anyone can walk into this store and see a use for the merchandise. So stop by whenever you are in Amarillo!  
There are 17 antique shops and malls next to Whispering Pines Antiques
located at 2727 SW 6th Ave - a quick jaunt off Interstate 40 on historic Route 66. 
And if you can't get there right away - visit Angie's blog www.whisperingpinecottage.net - you can't get much better than a virtual coffee break with Angie and her gorgeous shop!

Thursday, July 14, 2011

How-To: Easy "Paris" Banner

Happy Bastille Day!!  I love everything French and today is a day the French celebrate!  I made a "Paris" banner to celebrate - I could have done it in Red, White and Blue since those colors are France's national colors, but I already have one of those for Fourth of July!
 So I decided to go with the more popular pink, white and black 
colors for a Parisian Theme. 
Banners or garlands make everyday occasions extra special.
Here's an easy way to create a banner.
                                                                   
 
First, cut out a basic shape out of card stock for each letter that your banner is going to spell out.  I am going to make a banner that spells "Paris" so I needed five shapes.  You can use a Cricut machine to cut these out if you have one.  The shape can be a square, diamond, rectangle, circle - whatever you like that will fit the theme of your banner!  I like to use cereal boxes - the thickness of the cardboard is perfect and I always have a box with just a little left in it I can dump into another cereal!  You can cover the cardboard with scrapbook paper or just spray paint all the shapes at once when you get them cut out!

Punch two holes with a standard hole punch in each shape about two inches apart.

Grab some glue - I used this kind for this project  because the tip allowed for a tiny stream of glue to come out at one time.

Squeeze a narrow stream of glue along about half the edge at one time and . . .

 . . . dip the glued edge into your choice of glitter.  Tap lightly the glittered edge with your finger to make sure the glitter sticks to the glue. Repeat to adhere glitter to the second half of the shape and then do the rest of them.  

 I used Recollections Tinsel Glitter here so it looks a little more vintage.  German glass glitter is also good to use as it will tarnish with time if you want that authentic 'vintage' look!

Next, grab some scrap scrapbook paper in a pattern you like and cut a small diamond shape out of it.  I used this paper because it already had perfect diamond-shape clusters all over it and it was pink which fit the look I wanted. I also cut it out using a wavy shape scissor instead of plain scissors so the cut would be more interesting.  You can cut out any shape for this step - I just wanted little diamonds!

Glue the diamond shape scrapbook paper pieces to the middle of each shape.

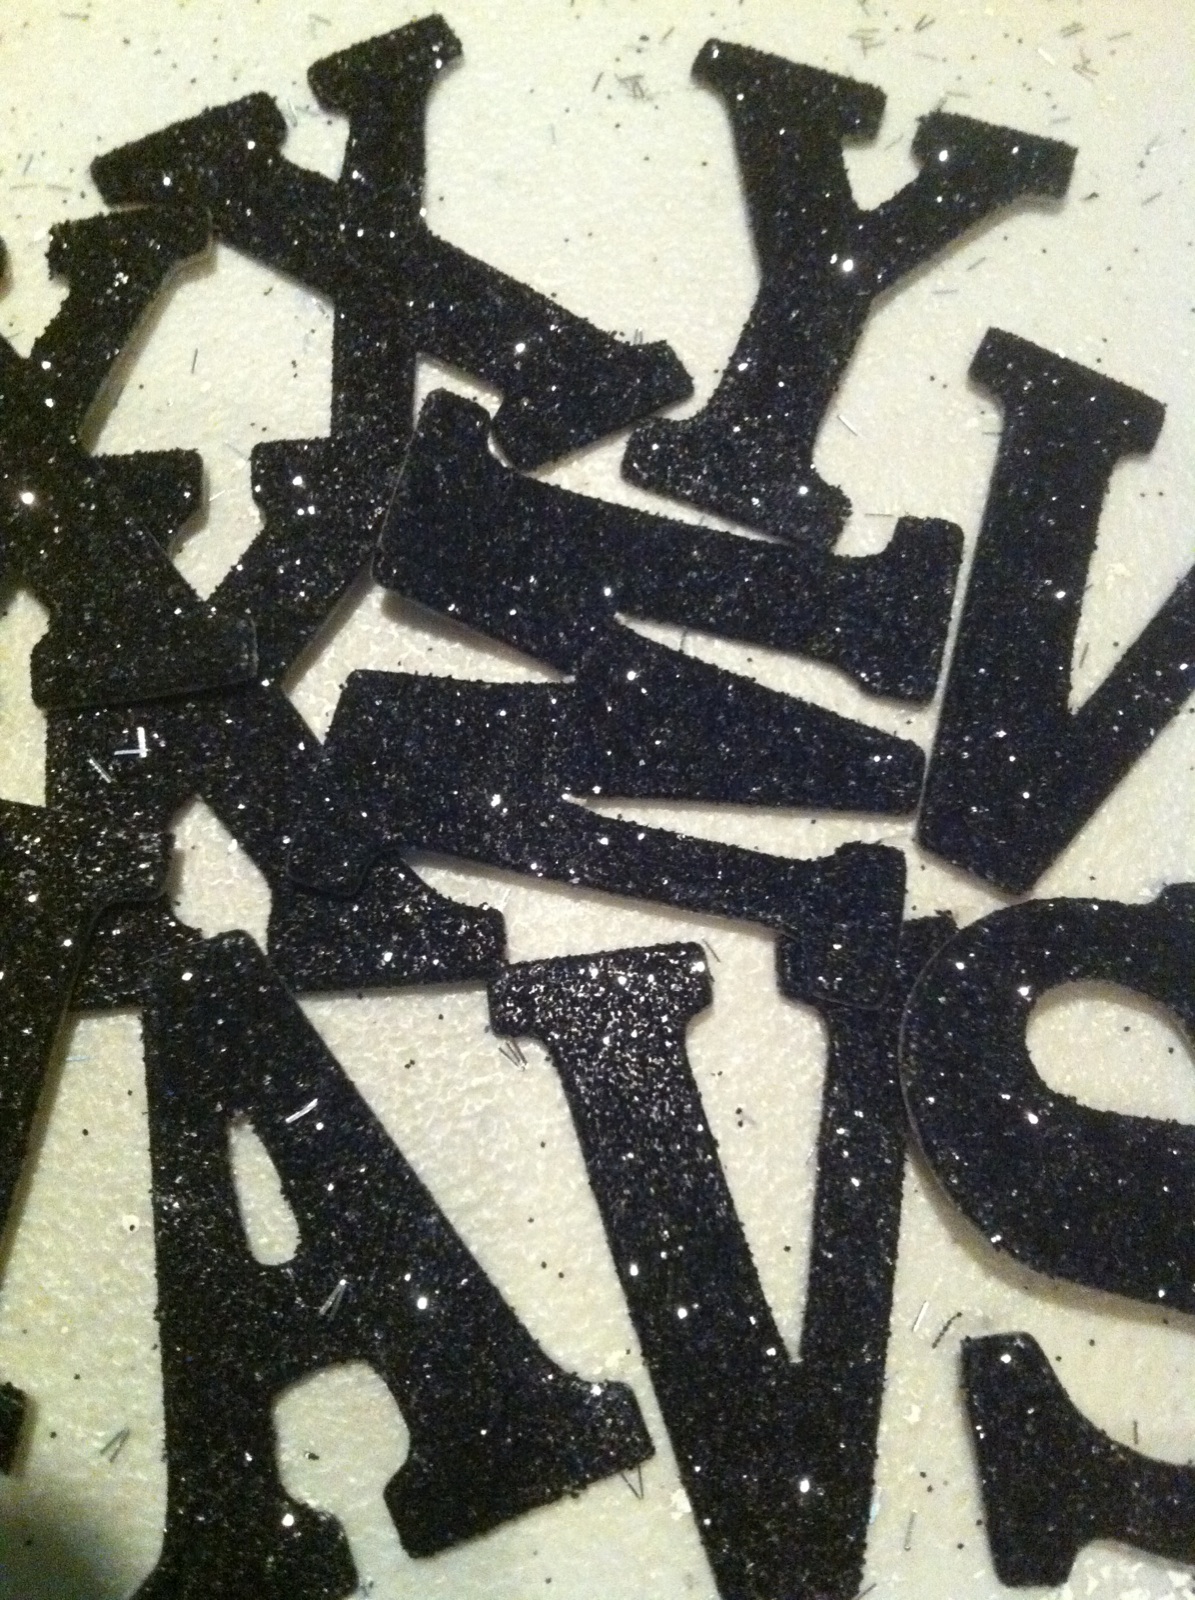
Find some glittered letters at your local craft store.  These come in lots of sizes and colors.  I am using black glittered letters for this project.  I have seen them in pastel colors, white glittered, red glittered, black glittered, etc.  

 You can print letters from your computer, like the letters on this banner,  and cut them out individually if you can't get to the craft store.  If you have a Cricut machine you can cut them out yourself or another option is to used rub-on letters but I suggest you rub on each letter before you add the glitter to the edges!

Glue one letter to each glittered edge shape - center it on the diamond and between the two holes you punched in the top to be sure it reads right when you string the letters together.

Finally, string the letters together in order to make your word.  I used black tulle to string these letters together.  You can use ribbon, jute, fabric scraps, shoelaces, just about anything to string your letters together to add character to your banner.  
My theme was Oooh La La "Paris" for this banner so frou-frou tulle was perfect! 
Make sure you cut a long enough piece to tie the ends to whatever you are hanging your banner on and enough to add bows if you like!  
I love making these banners and have several for sale at Melange. 
I have also made them for gifts and it is a gift the receiver seems to cherish!

I am linking up to these parties so check them out!

Fireflies and Jellybeans: Show Off Your Stuff Party

Somewhat Simple: Thursday Do It Yourself Party

Tuesday, July 5, 2011

Before and After: Vintage Double Bed

This vintage bed was a cherished designer piece decades ago.  A friend's teenage children worked at a consignment store in the East Bay area and they grabbed it while at work one day.  It served it purposed well while my friend's daughter attended the University of Nevada-Reno but was surrendered to me when she graduated,
to see if I could give it new life and purpose.

 The rounded foot board gives it classic styling and the groove along the top of both the head board and foot board adds some extra detail. But the front was still pretty plain and I decided it needed some embellishment.

So I set out looking for the perfect piece that would fit the arch on both the head and foot boards.  This was no easy task since the curve of the headboard was a bit more gradual than the curve on the foot board.  After numerous trial and errors trying to find two identical pieces to fit, (and a small fortune!) I realized I was going to need to different pieces. 

The bed needed lots of sanding to get the old cracked varnish off, and then a couple coats of primer to make sure none of the stain that had been used previously would come through when I gave it a new coat of antique white.  The embellishments really added that extra flourish to make this bed a standout piece.

Sanding between coats of paint kept the paint nice and smooth.  Next I distressed it to accent the curved lines and the details, which is hard to see in this picture!  Finally, I sanded, primed, and painted the wood side rails.  This double bed is now ready for a new life in a new shabby chic, cottage, country or french themed room!

I moved it into my space at Melange and topped it with a new bed canopy from Pottery Barn to really draw attention to it!  I strung one of my "Princess" banners across the canopy to set the stage!  I absolutely love this bed!   It is so much fun to see the excitement something I have worked on so hard brings to our customers.  It is going to be hard to part with it but I love it when a customer loves something as much as I do.
I know it will be cherished once again.


I will be linking up to these parties so check them out!


Wow Us Wednesdays at Savvy Southern Style


Faded Charm Cottage White Wednesdays

Friday, June 24, 2011

Quick Change: Red, White and Blue!

Welcome to my living room!  Well, its not exactly 'dressed' yet in this picture!  I was lucky enough to get new furniture this past year and I decided I would go with a neutral 'palette' that would make it easy to decorate for the holidays.  I LOVE to decorate for the holidays and when the boys were young, they loved coming home from school and seeing the house transformed.  Now that they are out of the house, I needed to find a way to decorate a little simpler, since I do not have so many hands to help anymore!
The neutral couch would be perfect for changing out pillows, the coffee table will get a runner and centerpiece, and the small shabby shelf above the couch, could hold some seasonal trinkets.  The shelf holds small, cherished photos of my grandparents all the time, but it has space for a few treasures!


  I found the vintage bicentennial tin plate with an eagle on it at a thrift store so I put it on the small gold easel.  The salt glazed pitcher and a deep red candle in a pewter candlestick add a bit of color and the metal star from Joann's Fabric Store balances the bright red of the candle. 

The coffee table vignette!  I first placed a neutral linen tablecloth I found at Homegoods, down the middle of the table.  Next came the vintage piecrust pedestal mirror - I found it that day with Margaret at the Sacramento Antique Fair.  I was so excited when I saw it because it was the nicest one I had seen in years, and in years - I had to have it for my collection. The deal was sealed when the kind lady came down $20 from her original asking price!  I added a vase, darling little crystal creamer, apothecary jar and a red vintage candy dish - to which I added (in order!) some flags and a baseball, penny candy sticks, red, white and blue poker chips, and a family favorite - Hershey's Kisses in the candy dish!

Fourth of July is enchanting for children . . .and adults!  It just brings out the child in all of us thus the reason I had to add some of my cherished collection of Boyd's Bears to my decor.  This red bear sits atop a vintage ammunitions box topped with a vintage lace hankie.  I painted the flag table years ago when three other neighbors and I all had toddlers at home.  We did country craft shows together and called ourselves 'Four Friends' - cherished memories!

Now for my quick change pillows!  I took a plain red and white striped pillow. . .

. . . and laid a large star-spangled cloth  napkin on an angle over the top of the pillow.  I folded the napkin back over the top of the pillow and safety pinned it to the back of the pillow, making sure the safety pins wouldn't show. By using safety pins, I can remove the napkin and change it out to a different one for a different season!  I needed to secure the napkin to the front of the pillow so something that will be pretty since it will show . . .

I dug into by jewelry box for some brooches!  I used a vintage sun brooch to pin down the point on the top of the pillow. Luckily, I had two sun brooches for my two pillows.  Star brooches, or even rhinestone brooches would work for the Fourth of July!  Done! You can adapt this method to any holiday.  The red and white striped pillows do triple duty for me - I can leave them as they are for a nautical look or for a candy cane Christmas! But the addition of a colorful napkin affixed with a vintage brooch and the pillows are only limited by your creativity!

Here's a close up of my other sun brooch!

Abracadabra! The quick change is complete!  A tall tin flower pitcher filled with red geraniums and white mums grounds the coffee table centerpiece.  I found the blue denim print pillow at The Tattered House, the fleur-de-lis pillow at Restoration Hardware and the red pillow with the shell accent at Homegoods.


 As empty nesters, my husband and I have lots of quiet times in the house.  The days of three boys running in and out the doors are gone for now and we can display mercury glass candlesticks on our fireplace hearth which we would never have done when they were all at home.  A photo and the teddy bear are reminders of those wild Fourth of July's when we saw sparklers and smoking snakes scar our patios. 
So from all of us, to all of you - have a Cherished Fourth!