Showing posts with label cherish. Show all posts

Monday, November 19, 2012

"Cherish" Room - Opening Day!

After a week of working almost day and night to get the walls of the room and furniture painted, vintage finds researched and priced, and making some holiday decorations, I decided it was time to open the room! After all - it is a work in progress - constantly!  Every time a piece of furniture sells, the room gets a makeover to make room for a new piece that may not fit in the old spot! AND - I have so many more holiday projects I wanted to put in the room before I opened, I realize now that I will never be 'done'! So please join me on a tour of my new space - the "Cherish" room at Fabulous Finds!

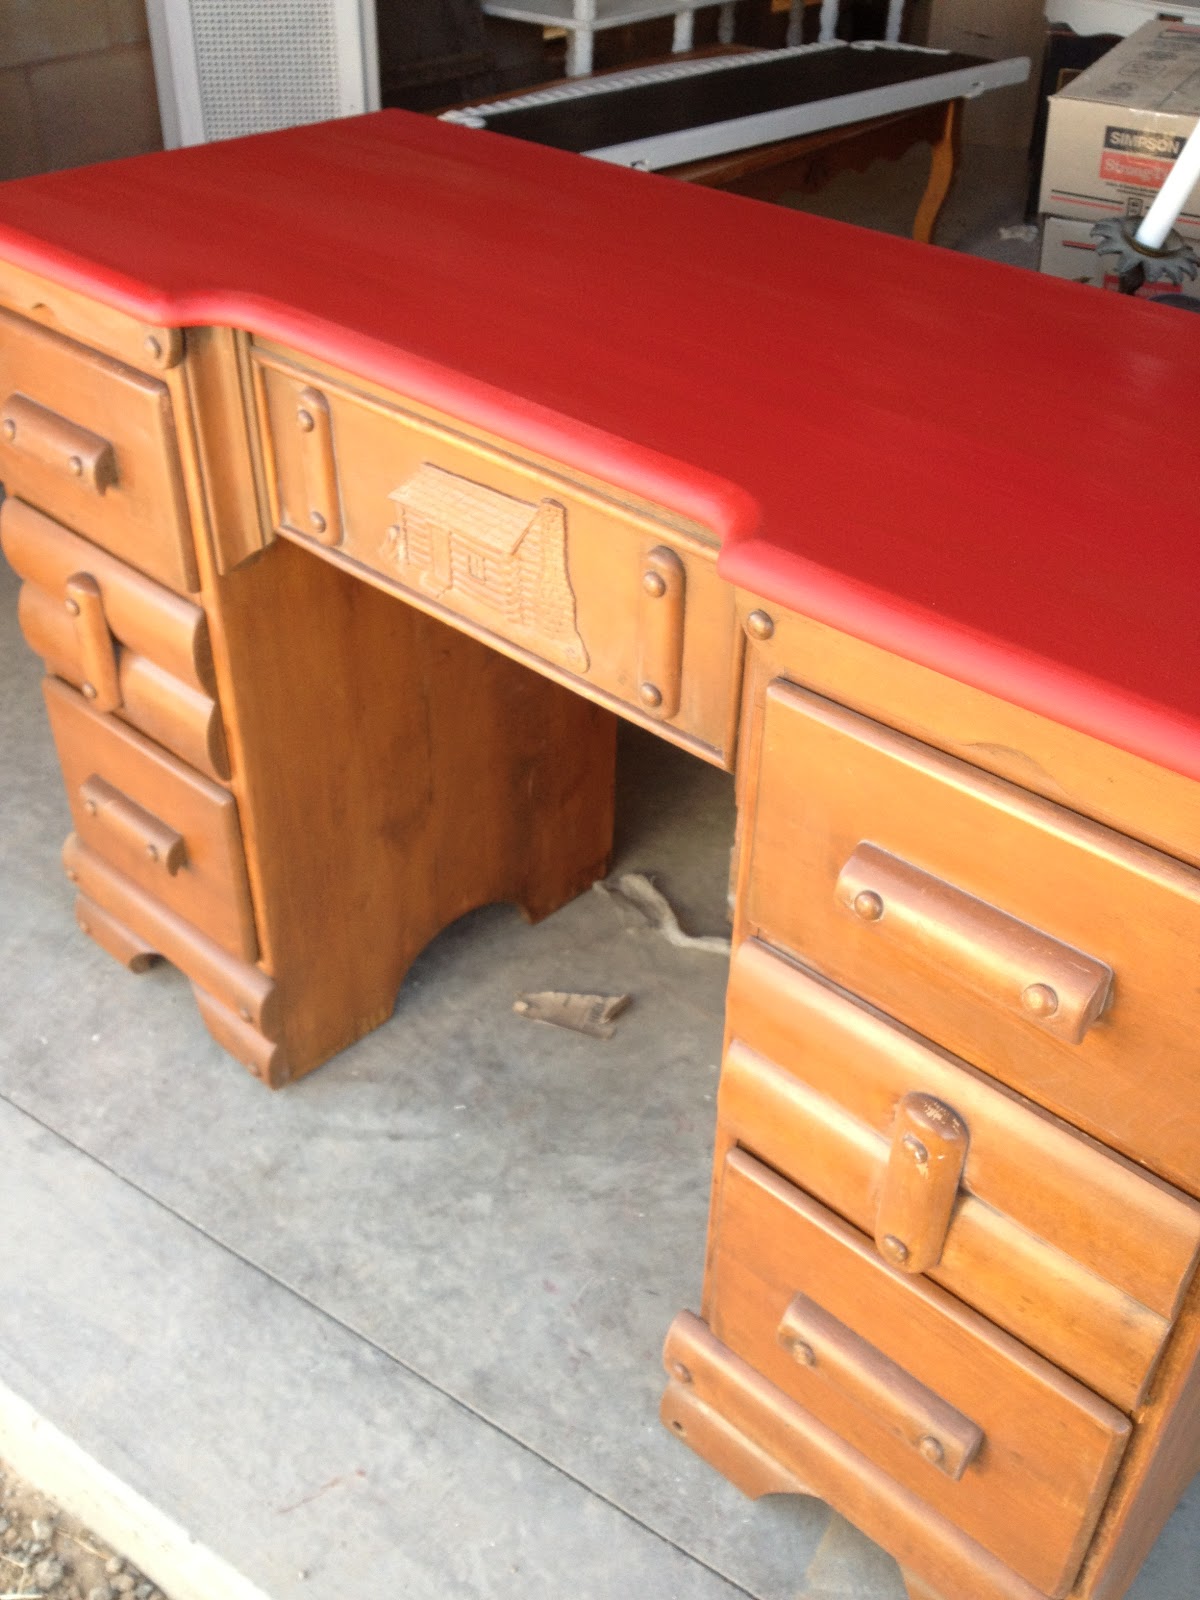
Let's begin on the east wall as you enter the room -this is my 'cabin' wall!  The desk is a vintage rancho style desk with a cabin on the front panel.   The red desk top is set off by the red of the child's rocking chair -a vintage Nichol and Stone from the late 1950's.  A hand forged iron cross is featured above a vintage mailbox stuffed with letters to Santa!

 This wall also features a bare wood framed chalkboard, a 'Merry Christmas' banner and some rustic frames.

The vintage metal shelf is a perfect display piece for a pair of vintage fawn salt and pepper shakers and the little boy Lefton Snowball Kissing Bell.


 Moving towards the right, the Christmas Tree is almost camouflaged by the printed fabric sporting a wood pile image, hanging behind it. How I snapped this one so blurry is beyond me but I'll take a new picture tomorrow and fix it!  The table sits on an old "Dancer's" table (see previous post!) and in front of it is an old ammo box. 


Ok - that's a little clearer!  A handmade "wish" banner encircles the tree loaded with glittered word ornaments, Victorian cone ornaments to fill, letters, and more!

The main focus wall of the room is next featuring a huge, beautiful vintage chalkboard and a 48" round pedestal table clad in this season's plaid!  The basket to the left on the floor is filled with two peppermint striped pillows, as does a black iron candle stand.

 On the table there are two apothecary jars filled with beribboned jingle bells,


a box of rusty metal tags with stencil letter cutouts perfect for monogramming a gift bottle for the holidays,


and a metal ornament tree with a flock of spring loaded dove ornaments!

Moving right again, we scan past a wall of vintage frames, a wire mesh shelf hung with stockings and a 'joy' banner, some letters, a small bird hook and other wall decor, to come to the ethereal section of the room!

Topped by a massive baroque style frame, this vintage dresser supports a trio of pastel holiday trees, and two mirrored stocking holders with pewter toned stockings. Look closely and you'll see a trio of little cherubs gracing the negative space!

The pastel tones in this corner offer a completely different holiday decorating choice.  A vintage french provincial dining table is the perfect piece to set the tone.  The white feather tree and vintage aqua tinsel tree add a bit of sparkle and softness, while the white lights add a bit of twinkle to the holiday magic!

 Under the padded 'dream' letters, two small magnetic chalkboards hang from the seven bird iron hook, and a rose cross stitch adds a touch of pink to the wall and ties in the vintage tablecloth.

Zoom in further and a vintage pair of playful fawns welcome you to the fantasy.  The 'cut crystal' platter is really a vintage acrylic piece!

Two more vintage fawns play in front of an old lidded jar with snowflake motif.  The ram ornament wishes you 'Noel".

Finding a home in the feather tree are some glittered owl ornaments, dove wreath ornaments and snow glittered jingle bells. (See that patch of green in the top right corner?  Check back to 'Cherish' Room - Day One to see how the whole room used to be that color!)

We now have arrived at the last wall - and where we walked in!  Another sea blue edged chalkboard hangs between the two room windows.  A spinning card rack is filled with Victorian die cut holiday cards, thank you cards, and other French themed blank cards - all offered for less than $2!  A set of old mattress springs serves as a back drop for the 'info desk' and also is great for displaying the variety of greeting cards, clipped on with clothespins.

The feathered angel wings fly above a photo album filled with pictures of 'special order' projects I've done. To the left -  a basket of raffle tickets wait to be filled out for some lucky person to win the newest Taylor Swift CD and a t-shirt, a special incentive for visiting my new space! Stop by and maybe you'll get an early Christmas gift to give someone, or keep for yourself! 

 Thanks for taking the tour with me - the "Cherish" room will continue to evolve with each new piece of refinished furniture, vintage treasure or handmade item I bring in - you never know what you'll find so stop by often! Let me know if there is something special you'd like for me to find or make for you - giving you things to 'Cherish' is what I love!

Wednesday, November 14, 2012

"Cherish" Room - Day Five!

Today was the first of two big moving days!  I took lots of furniture and wall decor I had been working on into the store and started setting it up in the room, after I finished painting one more wall the blue-gray color.

This antique shabby dresser was the first to be placed and was a temporary home for some accent trees until I can get all the furniture in place.

The little white rocking chair will end up in this grouping shown in front of the newly painted wall.  I didn't hang the large frame, choosing to set it on the little dresser until I have the other furniture in the room placed - I may need to move it a few inches depending on how much room I need!

Next up was this vintage desk.  The top of this desk had some scratches on it so I decided to sand and repaint the top before bringing it into my space.

 I repainted the top with 'Emperor's Silk' red.

 Next, I added a coat of clear wax -

followed by a final coat of dark wax to add depth to the desk top.  The original wood seemed a bit dry, so I added a light layer of dark wax to the rest of the desk as well and it really brought out the cabin details on the front panel!

  I placed the desk under the black metal items and rustic frames so it became the anchor of my 'cabin' wall.  I hung the hand forged iron cross above it and placed the 'Welcome to the Cabin' sign on the desk with a little tinsel tree.

I found this gorgeous chalkboard at the Sacramento Antique Fair at Restore and Rework's booth.  I gave it a fresh coat of chalkboard paint filling in the 'swirls' at each end to make them really stand out, added a fresh coat of white paint and then sanded the dentil molding across the top to make it stand out a little more.

This was just the piece I needed to grab customer's attention when they entered my room the first time.  I wrote one of my favorite sayings on it "Each heart is whispering - Home, home at last!"  Very appropriate for both Thanksgiving and Christmas - it reminds me of being away at college and traveling home for the holidays!

I put my 5 foot round shabby pedestal table in front of the super chalkboard and added a plaid tablecloth.  The red star to the left of the chalkboard repeats the red of the little rocking chair and I left some of my table top decor on the table - tomorrow all the table tops will get decorated.

Next, I hung this fun wire cubby shelf with four hooks - perfect for stockings!  The 'joy' banner and the 3-D metal letter 'm' may not end up here but for now they found a place to settle.

By the end of the day, the view from the doorway into the room changed quite a bit!  I'm bringing in another table tomorrow so depending on how it fits in the space I left for it, I may need to move things around again. The stage will be set for all the Christmas decor.  I can't wait to add ornaments to the tree, banners, twinkling lights, and do all the tablescapes!

Monday, November 5, 2012

"Cherish" Room - Day One!

After four months at Fabulous Finds, I am ready for some more space!  I'm inviting you on my journey of creating my 'Cherish' room, with daily blog posts for a few days documenting my room makeover! First, let's take a quick tour of the room to be transformed!

This bright green room was formerly the 'Kid's Room'.  There was a huge air hockey table in it that just sold, an enormous cubby unit if anyone is looking for a great storage piece for kids and there are still numerous collector's dolls and toys to be sold - at a great price! Come by the store and check them out! Although the green was perfect for kids, it was the first thing that was going to have to go! A little too 'electric' for what I was planning!

This space has one extremely high wall, a couple of angled corners, an open ceiling with a bar running at an angle . . .


and two windows in one wall which look into the main sales area.

I went to the paint stores in search of a good neutral color - not too dark but dark enough to show off all the furniture I paint white!  Looking through mountains of paint chips there was no color that I liked more than the color I used to have on the walls in my space at Melange when I was there, so I decided to go to Restoration Hardware and check out 'Silver Sage' - a kind of gray-blue-green!

 
That's it in the bottom right hand corner!  With paint chip in hand, I went to the nearest Lowe's and had the nice guy at the counter color match the paint swatch - not sure it saved me that much money since I had to buy premium paint in order to cover the lime green!  But at least I got it in eggshell finish - not a choice at Restoration!

The floors are cement, with a kind of gripper texture on them - kind of a nightmare since they 'grip' dirt!  I swept the floors and around the baseboard areas to get rid of anything that may drift onto the wet paint.  Then mopped up as much of the grime as I could get!


The floor looked pretty good so I started painting the walls around the edges - wherever the paint roller would miss - nooks and crannies and corners!

 Each time I reloaded my paint roller, I also swished the mop head over the floors thinking the wet would loosen some of the year old dirt.  I think I got it as clean as it was going to get - but I kept the wet mop handy for any paint drips!

 Then I proceeded to the walls - I was doing great but the six foot ladder I had was not tall enough to reach all the way to the top corners of that gigantic wall!  I finished painting over all the green and arranged to pick up an 8 foot ladder tomorrow! After washing out all the brushes, I thought 'Why didn't I check the height of the room before I started?!' Oh well! Lesson learned - you only have to wash out the brushes and rollers once if you've done your homework! See you tomorrow after day two - finish painting and  . . .