Showing posts with label Annie Sloan. Show all posts

Wednesday, November 14, 2012

"Cherish" Room - Day Five!

Today was the first of two big moving days!  I took lots of furniture and wall decor I had been working on into the store and started setting it up in the room, after I finished painting one more wall the blue-gray color.

This antique shabby dresser was the first to be placed and was a temporary home for some accent trees until I can get all the furniture in place.

The little white rocking chair will end up in this grouping shown in front of the newly painted wall.  I didn't hang the large frame, choosing to set it on the little dresser until I have the other furniture in the room placed - I may need to move it a few inches depending on how much room I need!

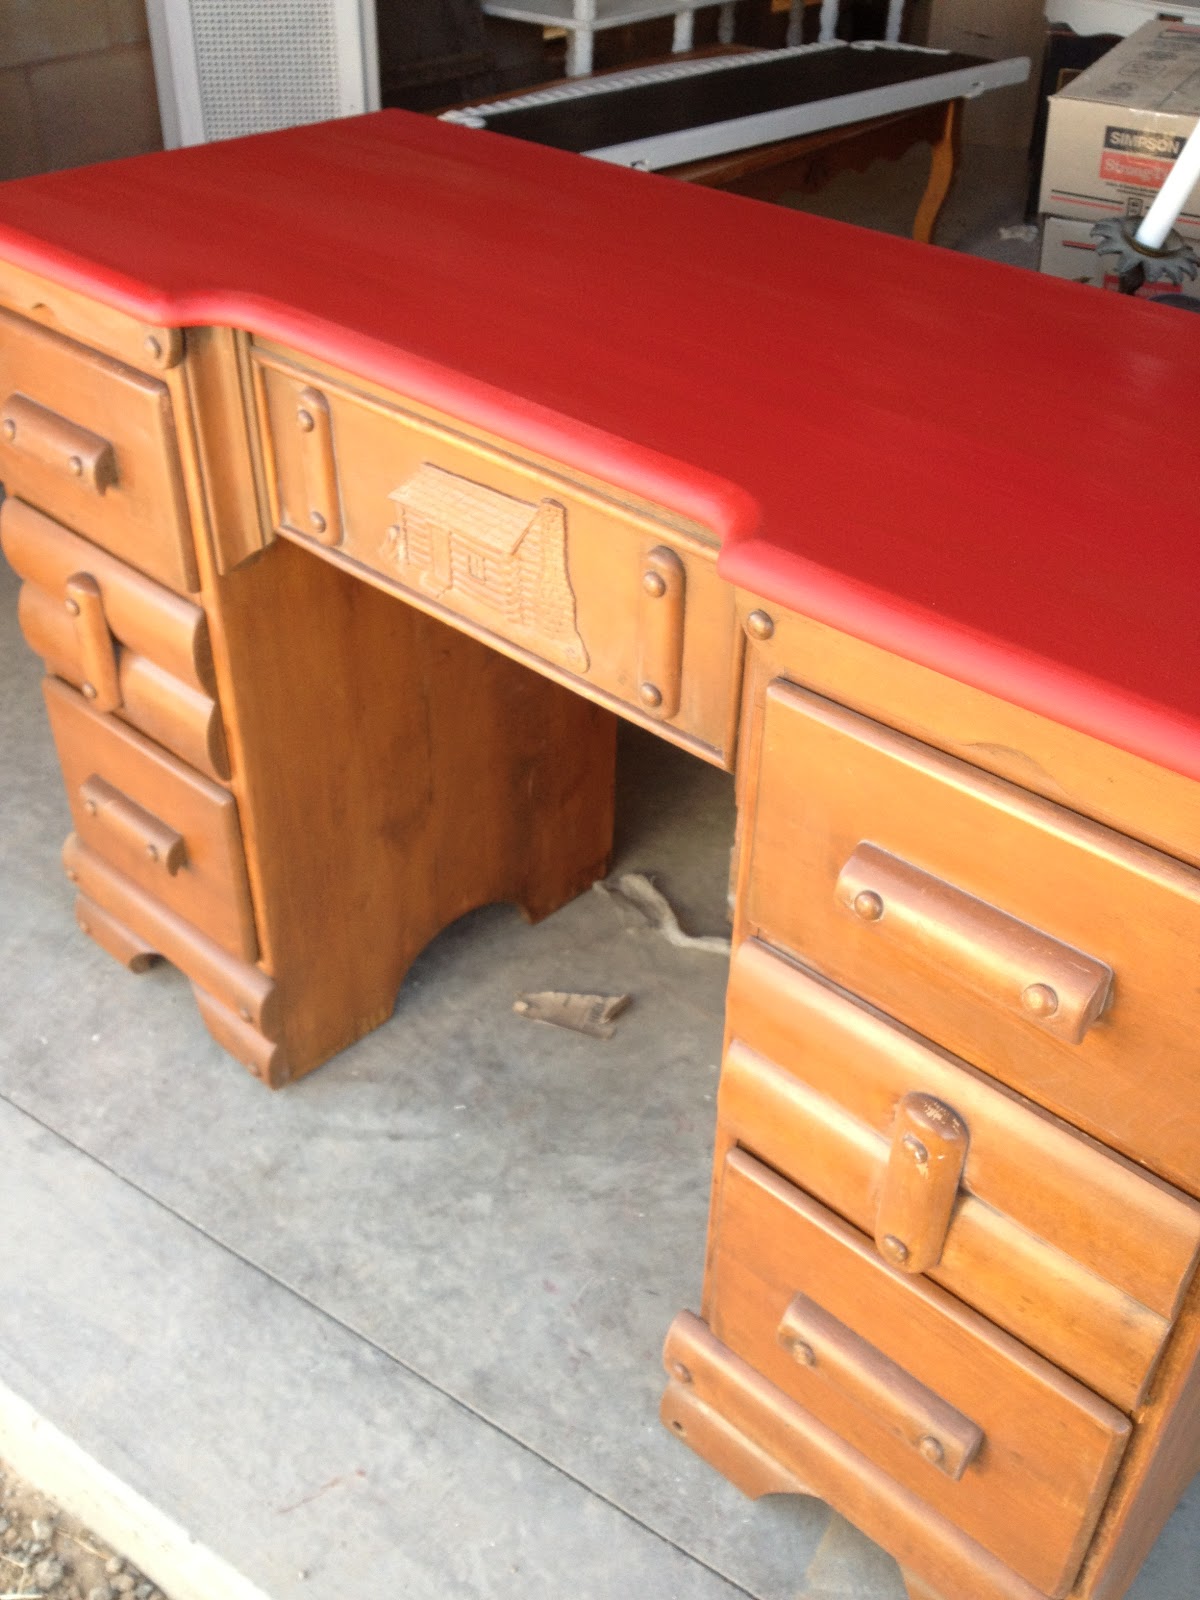
Next up was this vintage desk.  The top of this desk had some scratches on it so I decided to sand and repaint the top before bringing it into my space.

 I repainted the top with 'Emperor's Silk' red.

 Next, I added a coat of clear wax -

followed by a final coat of dark wax to add depth to the desk top.  The original wood seemed a bit dry, so I added a light layer of dark wax to the rest of the desk as well and it really brought out the cabin details on the front panel!

  I placed the desk under the black metal items and rustic frames so it became the anchor of my 'cabin' wall.  I hung the hand forged iron cross above it and placed the 'Welcome to the Cabin' sign on the desk with a little tinsel tree.

I found this gorgeous chalkboard at the Sacramento Antique Fair at Restore and Rework's booth.  I gave it a fresh coat of chalkboard paint filling in the 'swirls' at each end to make them really stand out, added a fresh coat of white paint and then sanded the dentil molding across the top to make it stand out a little more.

This was just the piece I needed to grab customer's attention when they entered my room the first time.  I wrote one of my favorite sayings on it "Each heart is whispering - Home, home at last!"  Very appropriate for both Thanksgiving and Christmas - it reminds me of being away at college and traveling home for the holidays!

I put my 5 foot round shabby pedestal table in front of the super chalkboard and added a plaid tablecloth.  The red star to the left of the chalkboard repeats the red of the little rocking chair and I left some of my table top decor on the table - tomorrow all the table tops will get decorated.

Next, I hung this fun wire cubby shelf with four hooks - perfect for stockings!  The 'joy' banner and the 3-D metal letter 'm' may not end up here but for now they found a place to settle.

By the end of the day, the view from the doorway into the room changed quite a bit!  I'm bringing in another table tomorrow so depending on how it fits in the space I left for it, I may need to move things around again. The stage will be set for all the Christmas decor.  I can't wait to add ornaments to the tree, banners, twinkling lights, and do all the tablescapes!

Monday, November 12, 2012

"Cherish" Room - Day 4

Today I was going 'off my rocker'!  Since children's rockers are always in demand for the holidays, I thought I better have a painting day at home getting the rockers I've found ready for my space.

This is a classic hardwood rocker and has simple styling for a child's room.  It is a collectible rocker from Nichol and Stone Co. Gardner, Massachusetts. I've had it in my space but it hasn't sold - it seems people just want some color these days.  Making the decision to paint a collectible piece of furniture is always a hard thing to do, but the goal is to provide a product that people want so it's getting painted!  Then the next hard decision - what color?!

I decided to go with Emperor's Silk red from the Annie Sloan chalk paint line - perfect for a little "Emperor" or "Empress"!  Red is a popular choice for children's rooms being able to accent cowboy or cowgirl, aviation, farm, sports, circus, primary colors or other themes.

Next, I added a clear wax, and then a layer of dark wax.
After buffing it out, the dark wax gives the rocker a richer finish, adding to the classic styling and preserves the heirloom quality of this rocker - perhaps this will be received by some cute toddler as a Christmas gift and then become an heirloom when it's passed down to future heirs!

Next, this oak rocker will be beautiful painted old white and then shabbied.

 
 The detailing on the back gives it the necessary frill for a little princess!

 Here is is after I coated it in Annie Sloan's Old White.

Next, I sanded it to bring out all the detail - but I wasn't happy with it - I used a sander and I didn't like the way it was sanding everything instead of just the little details so I repainted the fancy part of the chair and distressed it again.

 This time I did it by hand using small pieces of folded sandpaper to get in the little crevices - I like it a lot better now because it shows off more of the intricate, frilly details!  I finished it off with some clear wax.

Now it's just precious and would also make an heirloom quality Christmas gift for any little princess!  I can't wait to see both of them under the tree in my space!

My third little rocker is a delicate antique wicker rocker with an extra side pocket for reading material! Don't worry - I'm not doing anything to this one! This would make a great prop for a children's portrait photographer.  I think I'll make a little pillow for it's seat  - but choosing fabric is always hard to do because the fabric choice could either make or break a sale!  So I thought I'd ask my readers -what kind of fabric do you see on this?

 I need help with this one too!  What color would you paint this little rocker?  I think it needs a cushion too so think about color and fabric choice! I'm open to any suggestions! Leave me a comment below this post and we'll see what others think! Tomorrow is a big day - moving lots of furniture in!

Tuesday, October 9, 2012

Before and After: Vintage Vanity and Mirror - Together at Last!

 An incredible stroke of luck brought me to this piece that I had been searching for since last March! My husband and I were on a summer road trip through Oregon and he was kind enough to let me go pickin' along the way! 

Our trip started in St. Helena and we then traveled north to hit the Oregon Coast. With absolutely no reservations or plans we were free spirits - we both love 'winging it'! We've been pretty successful thus far with this modus operandi, finding hotel gems such as Ireland's Rustic Lodges (next blog post!)

After stopping at numerous thrifts and antique stores, I received a recommendation from a shop employee to visit another Antique store just up the road - but I had to hurry since they closed at 5!  We arrived at 4:45pm and the owner was kind enough to let me take a 'quick look'.

It is REALLY hard to take a 'quick look' at a beautiful antique store full of treasures and this one even had an upstairs! I was going to have to go fast!  I whisked along, my eyes darting to and fro, taking in as much as possible without causing sensory overload!

That turquoise blue always catches my eye and this beautiful milk glass piece jumped out and stopped me in my tracks!  I set it on the counter and then I almost took the stairs by two. When I got to the top I turned left - and then I saw it! The bottom half I needed to complete my vanity!
You see, I bought this mirror (shown here without the glass!) at a consignment store in 
St. Helena nearly two years ago.  I thought for certain I'd be able to match it up with a bottom half fairly quickly and then refinish it for resale.  But it wasn't as easy as I thought, since the mirror was huge and had a part that dropped down with no frame - I was going to need a special cabinet to complete the set.
  
 My husband said, "How do you know its going to match up with the mirror?"  I told him it was karma and I had been looking for a long time so I just knew it would match up! I quickly paid the lady and loaded it into our car.  I had no idea how well it would fit until I got home and took the mirror out of storage - it was the exact same width! The cabinet had two piers, which accommodated the mirror, since the mirror extended below it's frame.

I took the mirror out of its frame and sanded it down. 
Then I did a quick sanding of the bottom cabinet part of the vanity as well.

After a few coats of Annie Sloans' Old White, the pieces looked refreshed!
 I then distressed each piece to bring out the beautiful carvings and details . . 
.
 (Monet likes to give me advice!)


 . . . and added a coat of clear wax for protection. 
After almost two years, it was time to finally see the finished pieces together!

I carefully replaced the massive mirror and secured it with the holds. . .


and replaced the glass knobs on the drawers. Now for the  big marriage,
I heaved the mirror up to place on top of the vanity cabinet.

I absolutely love it!  My long lost vanity is now complete 
and I can't even think about selling it!
This is one piece I will hold on to - a piece to cherish 
and hand down to the next generation.
I guess it's true - good things come to those that wait!

Monday, October 1, 2012

One Shelf - Two Ways!

It's amazing how refinishing something changes the whole personality of a piece.  
My friend, Valerie, was looking for a shelving unit 
to put in her dining room to display her platters and other dishes. 
I was looking for the same type of shelving unit 
to use for my fall and holiday displays at the store.
We each purchased one of these shelves and set to work refinishing.

Valerie removed the top scalloped board to give the shelf a more streamlined look, in keeping with her style - such a great idea!  Self - customized!!

Then Valerie painted hers a creamy light green to match her wall color 
and added a dark glaze over the paint to give a subtle antiquing effect.  
Valerie wanted a refined country look!

Now she has a beautiful shelf which enhances her white dishes 
and makes them pop on display!

I painted my shelf with Annie Sloan's Emperor's Silk (Red)
chalk paint. . .

 and then finished with dark wax to really bring out the details
in the rough finish wood.  The dark wax settled into the grooves
and pits, and added an antique look to the shelf.
I wanted a cozy hunting cabin look! 


Now I have a display shelf in my space at Fabulous Finds that will take me from the warm colors of fall to the reds and greens of the holidays! 

Even though both shelves started the same, 
they now have their own personality and style
to match the needs of the rooms in which they hang.
Isn't that what decorating is all about?!