Showing posts with label Christmas tree. Show all posts

Wednesday, November 14, 2012

"Cherish" Room - Day Five!

Today was the first of two big moving days!  I took lots of furniture and wall decor I had been working on into the store and started setting it up in the room, after I finished painting one more wall the blue-gray color.

This antique shabby dresser was the first to be placed and was a temporary home for some accent trees until I can get all the furniture in place.

The little white rocking chair will end up in this grouping shown in front of the newly painted wall.  I didn't hang the large frame, choosing to set it on the little dresser until I have the other furniture in the room placed - I may need to move it a few inches depending on how much room I need!

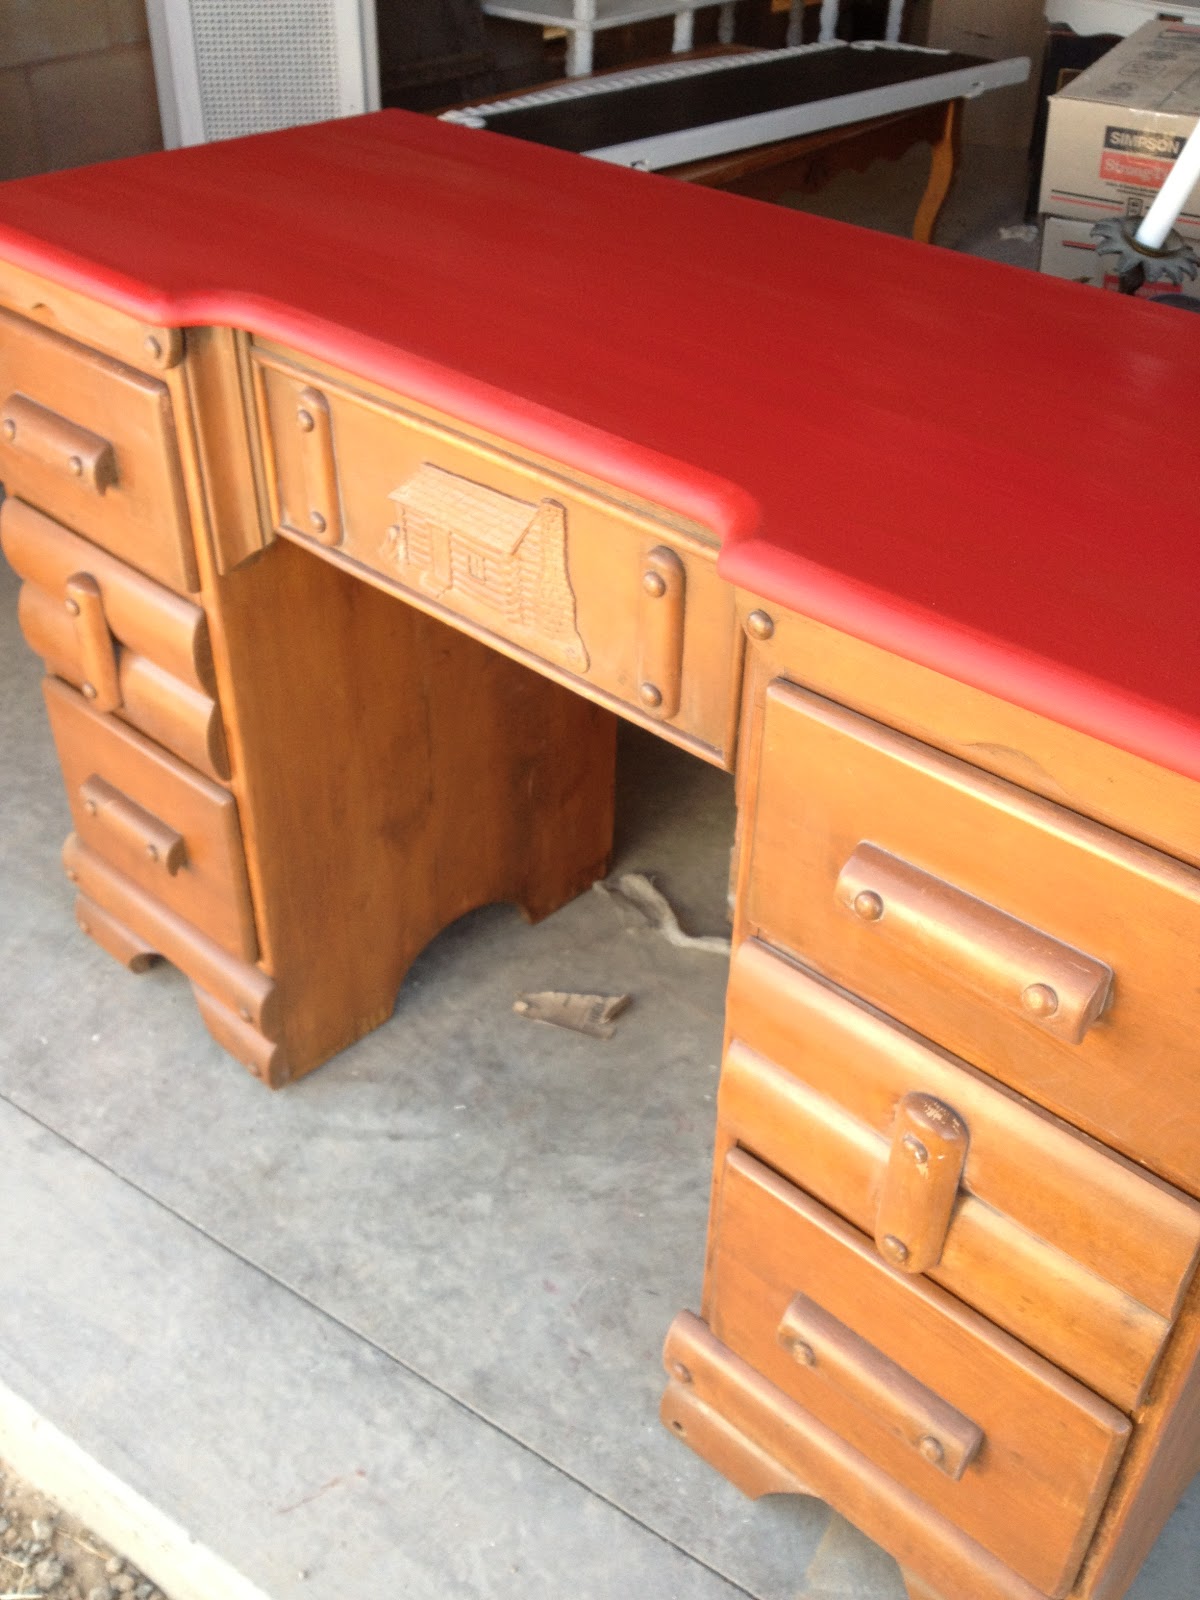
Next up was this vintage desk.  The top of this desk had some scratches on it so I decided to sand and repaint the top before bringing it into my space.

 I repainted the top with 'Emperor's Silk' red.

 Next, I added a coat of clear wax -

followed by a final coat of dark wax to add depth to the desk top.  The original wood seemed a bit dry, so I added a light layer of dark wax to the rest of the desk as well and it really brought out the cabin details on the front panel!

  I placed the desk under the black metal items and rustic frames so it became the anchor of my 'cabin' wall.  I hung the hand forged iron cross above it and placed the 'Welcome to the Cabin' sign on the desk with a little tinsel tree.

I found this gorgeous chalkboard at the Sacramento Antique Fair at Restore and Rework's booth.  I gave it a fresh coat of chalkboard paint filling in the 'swirls' at each end to make them really stand out, added a fresh coat of white paint and then sanded the dentil molding across the top to make it stand out a little more.

This was just the piece I needed to grab customer's attention when they entered my room the first time.  I wrote one of my favorite sayings on it "Each heart is whispering - Home, home at last!"  Very appropriate for both Thanksgiving and Christmas - it reminds me of being away at college and traveling home for the holidays!

I put my 5 foot round shabby pedestal table in front of the super chalkboard and added a plaid tablecloth.  The red star to the left of the chalkboard repeats the red of the little rocking chair and I left some of my table top decor on the table - tomorrow all the table tops will get decorated.

Next, I hung this fun wire cubby shelf with four hooks - perfect for stockings!  The 'joy' banner and the 3-D metal letter 'm' may not end up here but for now they found a place to settle.

By the end of the day, the view from the doorway into the room changed quite a bit!  I'm bringing in another table tomorrow so depending on how it fits in the space I left for it, I may need to move things around again. The stage will be set for all the Christmas decor.  I can't wait to add ornaments to the tree, banners, twinkling lights, and do all the tablescapes!

Friday, November 9, 2012

"Cherish" Room - Day Three!

My car was filled to the brim as I pulled out the driveway! One thing you get good at in this business is creative and strategic car packing.  The old spring mattress was the first to go in with a packing blanket on top since I was going to have to put my little black table upside down on top of it and I didn't want the table to get scratched!  More packing blankets topped the table and then the frames lay nicely on top of it. The painted letters all sat on the front passenger seat.  I brought along a few more seasonal items for my display and and a box filled with my tools for the day.

It was so nice to be greeted by a newly painted room!  I decided to start with arranging my frames.

The slender part of the wall was a perfect fit to start hanging the frames. Empty frames, both simple and fancy, are often requested by customer, with numerous creative projects found on Pinterest these days!  The most popular projects are chalkboards and bulletin boards.

Frames can also be used to create architectural interest on bare walls, and then filled with other wall art such as letters, mirrors, and wow! Actual artwork!  I try to create displays to give customers ideas of how to decorate their own homes.

Next up the letters! Now you can see what I needed them for!  I wanted to spell "Cherish" but I didn't realize I was missing the "C" so I decided to go with "Wish" for the Christmas season! Hopefully my "C" will come in by the time the holidays are over!

To create the feel of the holidays, I like to use fabric backdrops to add some drama to my space.  I found this amazing fabric which looked like a wood pile and it immediately said 'winter' to me. Using just safety pins, I folded the edges in to narrow the fabric width in order to match the space width, then folded the top over a dowel and safety pinned the fabric along the length of the dowel.

 Using safety pins instead of actually cutting and sewing allows me to use the yardage for another purpose once I'm done using it for a backdrop.  I screwed two garment hooks into the wall for the dowel to rest on.

 Luckily, two coworkers Karen and Betty, were there to help tell me when it was level - otherwise I would have had to climb up and down that ladder a million times to check and recheck.

I placed my little black table just in front of the backdrop and put a piece of burlap down to protect the top.  I purchased an artificial Christmas tree at Smith and Hawkins when they were going out of business and this will be the third year it has been my display tree.  I plugged it in to check the lights before putting it up and once again they all lit up, so five minutes later the tree was up and sparkling.

Wow - I guess I didn't focus well enough! The old eyes just ain't what they used to be! I'll get a new picture and replace this one as soon as I can! 

The black chalkboard to the left was the starting point for this grouping.  Paring the black metal pieces with the more rustic frames, echoed the black background and wood in my back drop fabric. 

With everything I brought put up, it was time to head back home to get some more painting done.  It's finally starting to look like I have accomplished something!  All the wall items need to be in place before bringing in the furniture as it's much harder to deal with hanging pictures, etc. when you have to move everything in front of it - that is one nice thing about starting a space from scratch!

Here's one more look from the doorway - I just noticed the oval mirror inside the large white frame repeats the oval of the white frame - glad that worked out!  The furniture in the bottom right of the picture still needs to be moved out of the space and then I can start working on the next two walls. Thanks for following along so far - more to come tomorrow!