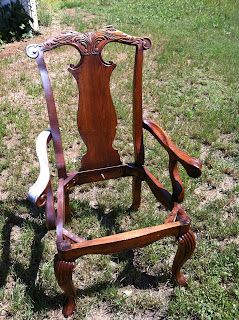
One look at this arm chair and I knew it would be gorgeous all shabby! The carvings at the top of the chair were exquisite and I loved the ribbing down the curve of each leg. It was nice and sturdy and came with a padded seat which I took off in order to shabby. I started priming it and then remembered that I needed to take a 'before' picture -
that is what the white is on it!
The pad just happened to be in great shape and I loved the tone on tone linen look so I just screwed the original pad back on after I sanded, primed, painted and then distressed the wood to help the beautiful carving stand out more!
This wall mailbox was dirty and had the remnants of stickers on the front. It quickly got a thorough cleaning and some goo-gone took the sticker remnants right off. These mailboxes usually have a metal eagle attached where the holes are - but this one must have taken flight! What was I going to replace the eagle with? I wanted to make this look a little more feminine thinking it would be great for storing office files in home office. It was just the right size, would even hold legal size and the closing lid would hide the mess of paper files out of view. After some light sanding and a coat of primer,
I decided I would paint this two-toned.
I grabbed all the wooden embellishments I had on hand and started placing them over the holes. This one covered all of them beautifully! So after some light sanding and priming, I decided to paint this pink and white, and then glued the wooden embellishment on with some E6000 glue. Now this 'mailbox' is ready to store files or even to collect the mail! Both of these projects are now on sale at Melange!


No comments:
Post a Comment
Thanks for posting a comment! I love hearing from my readers! Feel free to add ideas or make a special request and remember to Cherish Everyday!